How to build the JEMTOY Tiny Toy Bee Hive ~ YouTube Video Instructions
Download Tiny Bee Hive SVG for Glowforge Laser Cutter
My wife is a keeper. She is my honey. What I’m trying to say is, my wife is a bee keeper! She has a hive of honey bees that she looks after and cares for. When it came time to give her a little gift, I searched far and wide for something fun that was honey bee related.

All I could find were little silver honey bee charms and pendants. They all looked pretty much the same. For some reason it wasn’t fun enough for my sweet wife. Way back when, I helped her build and paint her wood hive, so I had a good idea of all the working parts and how they went together.
I decided to design a tiny little toy bee hive as a gift for the bee keeper in my life. I now share the SVG file with you, in case you want to make one too. It really is the perfect gift for a bee keeper.
Download Tiny Bee Hive SVG for Glowforge Laser Cutter
Advanced Tip: If you are proficient using the free program, Inkscape, you could update the SVG file with a name or logo so that the little bee hive is customized to their name or brand. (I also happen to offer an online course that teaches Inkscape for Glowforge if you want to learn how.)

I design for Glowforge laser cutter, so my SVG files are in color. You can make this tiny bee hive using any laser cutter that will run using a SVG file.
Download Tiny Bee Hive SVG for Glowforge Laser Cutter

Glowforge Task Order and Settings:
- BLUE = Engrave (HD Graphic)
- GREEN = Score (High Quality)
- RED = Cut
- BLACK = Cut

Download Tiny Bee Hive SVG for Glowforge Laser Cutter
You will need access to a laser cutter, 1/8″ thick plywood, and glue. White glue, wood glue, or super glue will work.
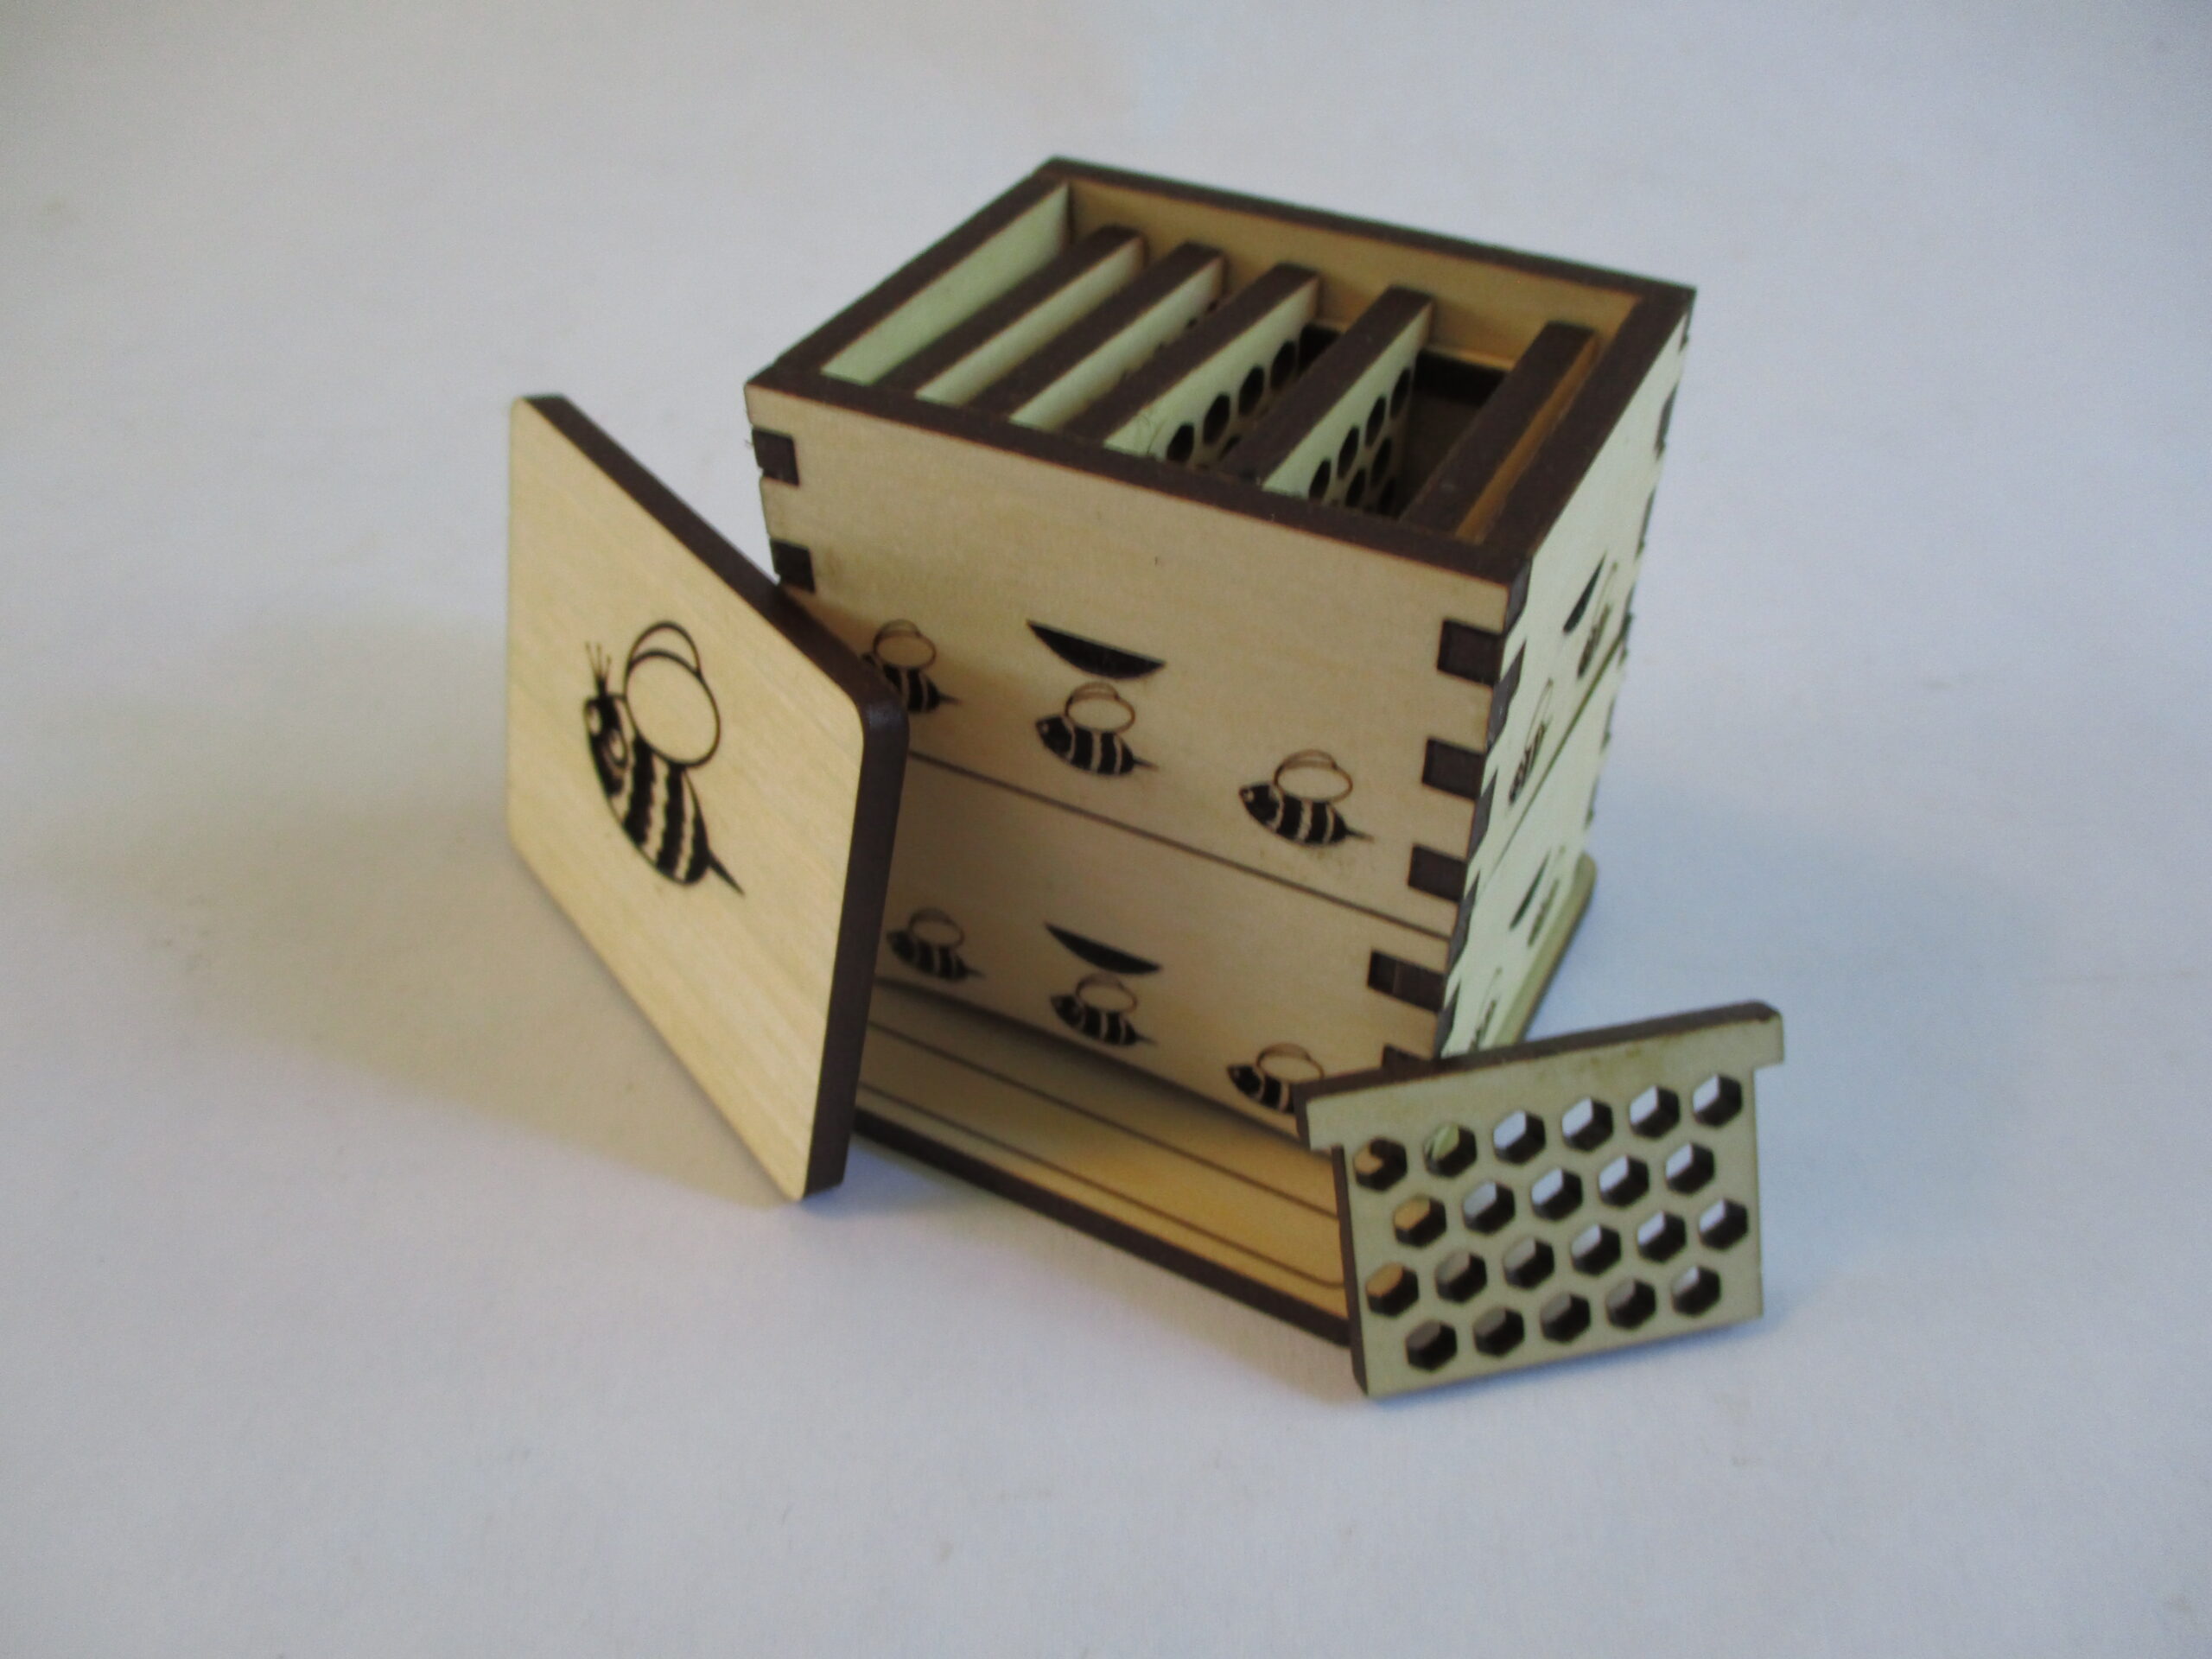
- Before you glue it all together, let’s see where everything goes.
- To build the box you need 2 long sides, 2 short sides, and 2 little slivers I call runners.
- Fit the short and long ends together into a box so the bees are all along the bottom.
- Looking at a smaller end of the box, you will notice a small gap on each side near the corner where the tabs connect. The little runner goes in that gap across the top into the other side’s gap.
- The runner’s function is to hang the trays. It works just like a vertical filing system.
- Be sure to include those two little runners across the top when you glue the box together.
You will notice that only one of the long front pieces has an arched “doorway” at the bottom. That’s the bottom box when the hive is stacked. The top box stacks evenly on the bottom box.

