
Here I share a set of 2 SVG files: one for wood, and one for acrylic, so you can laser cut and make your own BMO Lamp. This is an advanced build that requires many skill sets to accomplish.
- First you must have access to a laser cutter.
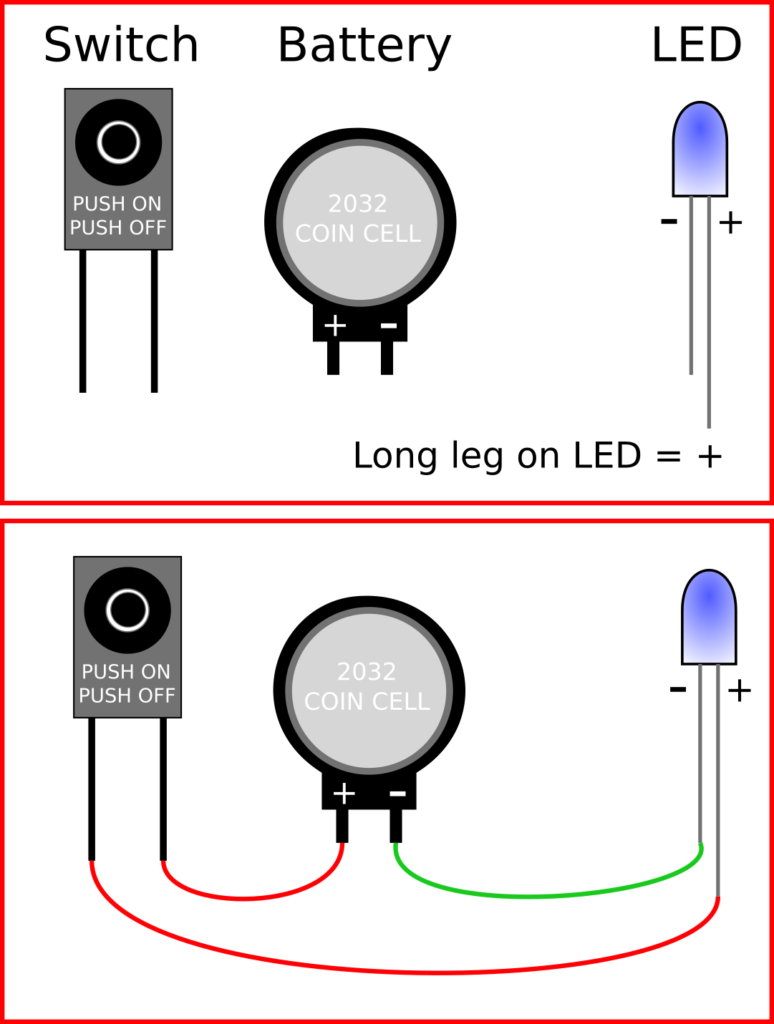
- You have to buy and then solder a coin cell battery holder, 2032 battery, LED, and an on/off switch into the lamp.
- You may have to make small adjustments to the SVG, such as adjusting the hole for your on/off switch depending on the electronic parts you are using. Open the SVG using the free program: Inkscape. NOTE: Beamo’s parts are “grouped” together. Highlight any part you want to modify, CTRL+SHIFT+G will ungroup. Adjust the individual part, such as the hole for your switch. Then highlight it all and use CTRL+G to group the parts back together before you send it to Glowforge.
All those skill requirements makes this a bit of a challenge to build, yet it’s so great, I know plenty of you can pull it off easy. I do offer the Learn Inkscape For Glowforge course, if you want to learn how to modify and customize SVG designs like this.
Purchase the BMO Lamp SVG at Etsy
The BMO Lamp is a simple wood box with rounded corners. The outer edge is made using two strips called a “living hinge”. This allows for the edge to wrap around the entire body giving BMO his soft rounded corners. The longer hinge piece is the top, and the shorter wraps along the bottom.
This project requires 1/8″ thick plywood, and a bit of 1/8″ thick acrylic for the clear face plate where BMO lights up. I have the SVG file for both.
The acrylic face plate has a 2 part wood frame.
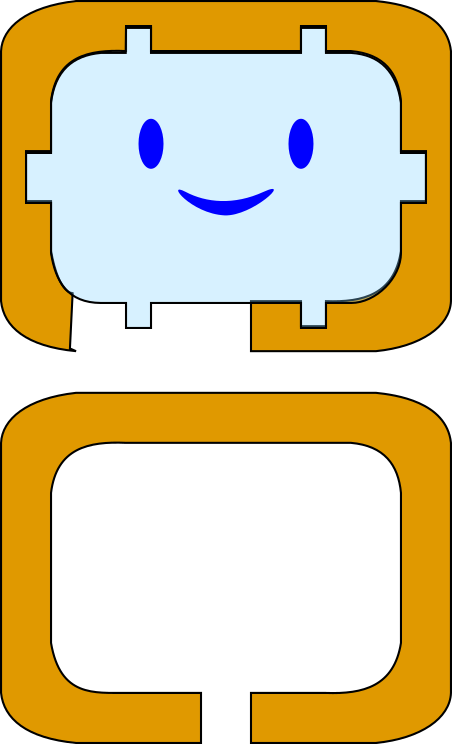
Start by gluing the acrylic face into the frame with corresponding notches with the frame gap along the bottom. Then on the back, glue the second frame so the notch is also along the bottom.
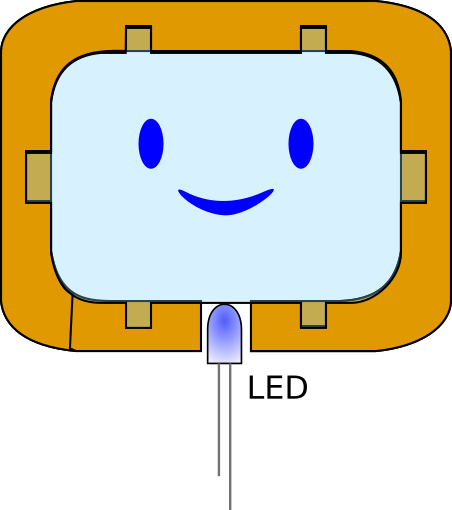
The bottom notch is where the LED will go. The LED should be glued in this notch so its tip touches the acrylic along the bottom edge. That will make the face glow. Glue the wood frame and LED inside BMO’s body so his face is in the right place.
You have to solder your electronic parts and be sure it all lights up and the switch turns it on and off before you glue BMO all together.
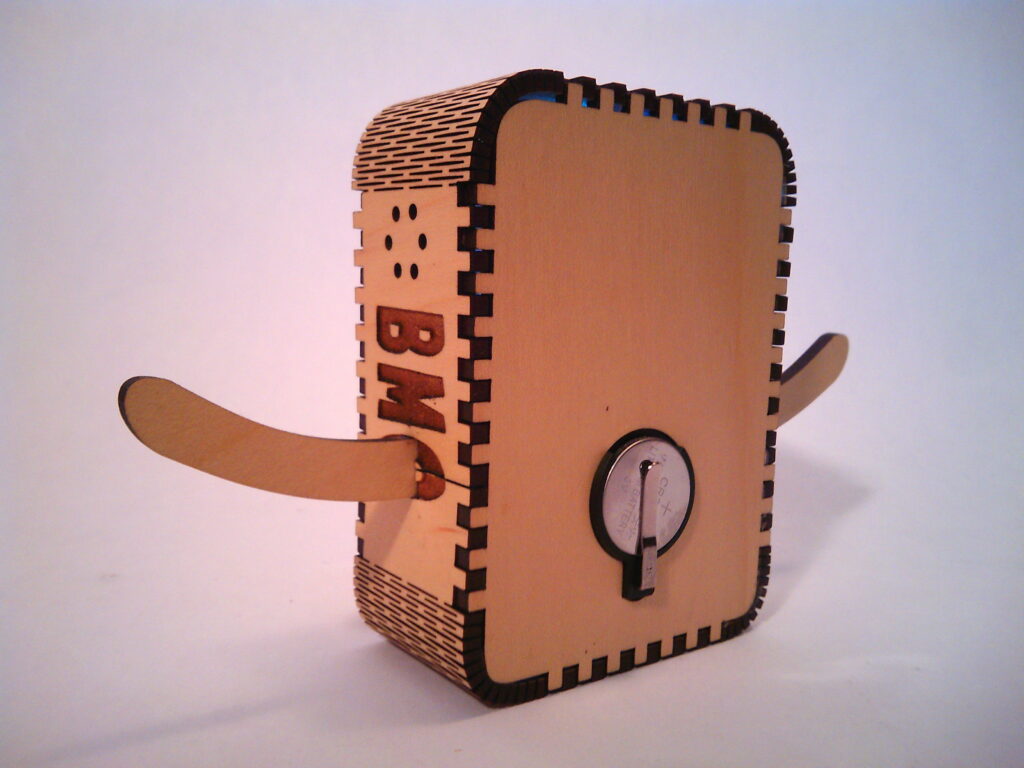
- Hot glue the coin cell battery holder from the inside, so it stays put in the hole cut for it. Position the battery holder so the battery can easily be changed from the outside on the back. Pay attention so you don’t glue it in backwards, or you’ll feel silly. You want to be able to change the battery from the outside. Once BMO is glued together, you cannot open the box.
- Glue the LED into the notch in the wood frames around the face plate. Push the LED into the notch and be sure to touch the LED’s tip to the bottom edge of the acrylic. If done right the etched face will catch the light. It’s amazing. Glue the LED in place.
- I had best luck using hot glue inside, holding the living hinge and everything else in place as I carefully held it until the hot glue cooled. Small wood clamps helped hold things in place. Remember to catch the arms and legs in their peg holes as you glue the living hinge around the edge.

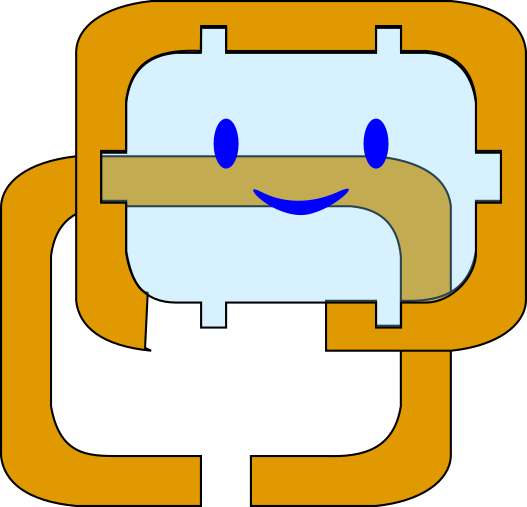
To wrap the living hinge pieces around the front and back half, notice that the little pegs along the outer edge have a gap. (The gap is a bit below where the arms are in the illustration above.) Bottom left side you see 3 pegs, the gap, and then 7 pegs above it. The top hinge piece starts at the left gap and wraps over the top of both halves, and ends at the gap on the right. Put the arms and legs in place. The bottom piece of hinge also starts at the left gap, wraps the bottom, and ends at the gap on the right. Be sure to catch the arms and legs in their peg holes as you go. Legs go in the 2 deep slots on the bottom and stick out straight forward. The arms catch in the slots created when the two hinge pieces meet at the gap. When the hinge pieces are on correctly, the side reads BMO with his arms coming out of the O.
The black circle illustrated above, is the hole where the on/off switch will mount (see links below). Be sure the hole is good for the switch you have by first making a hole template so you know the size is right.
If you have different electronic parts than me, you may need to adjust the SVG to fit your electronic parts. I suggest that you design a hole template that has a series of holes, each a bit larger than the last, using Inkscape.

Test your electronic parts for fit in various sized holes using scrap wood before you cut a huge project. I make a little square using Inkscape with several holes in it, save it as a SVG, laser cut it on scrap wood, then test which hole fits best until I get it right. Copy/paste the hole you require into the BMO Lamp SVG so your switch and battery holder will fit your project.
If you need to Learn Inkscape For Glowforge, take the course, and you’ll know how to make your own templates and design your own cool stuff.
Purchase the BMO Lamp SVG at Etsy
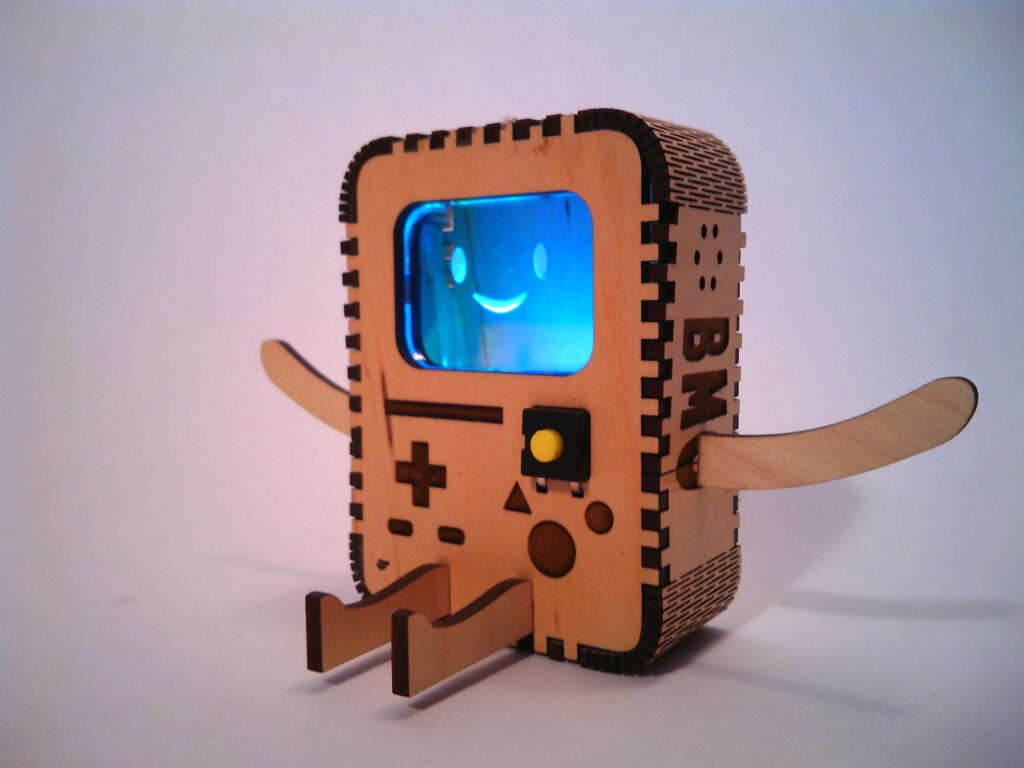
I’m a huge fan of Adventure Time so I wanted to make a BMO nightlight lamp to put next to my bed. This is the prototype I designed on Inkscape and then cut the wood and acrylic on my Glowforge laser cutter. I assembled and hand soldered the LED, on/off switch, and battery holder into place so BMO is a full on geeky project… it’s so… MATHEMATICAL – YEAH! I really hope you have fun making this project.
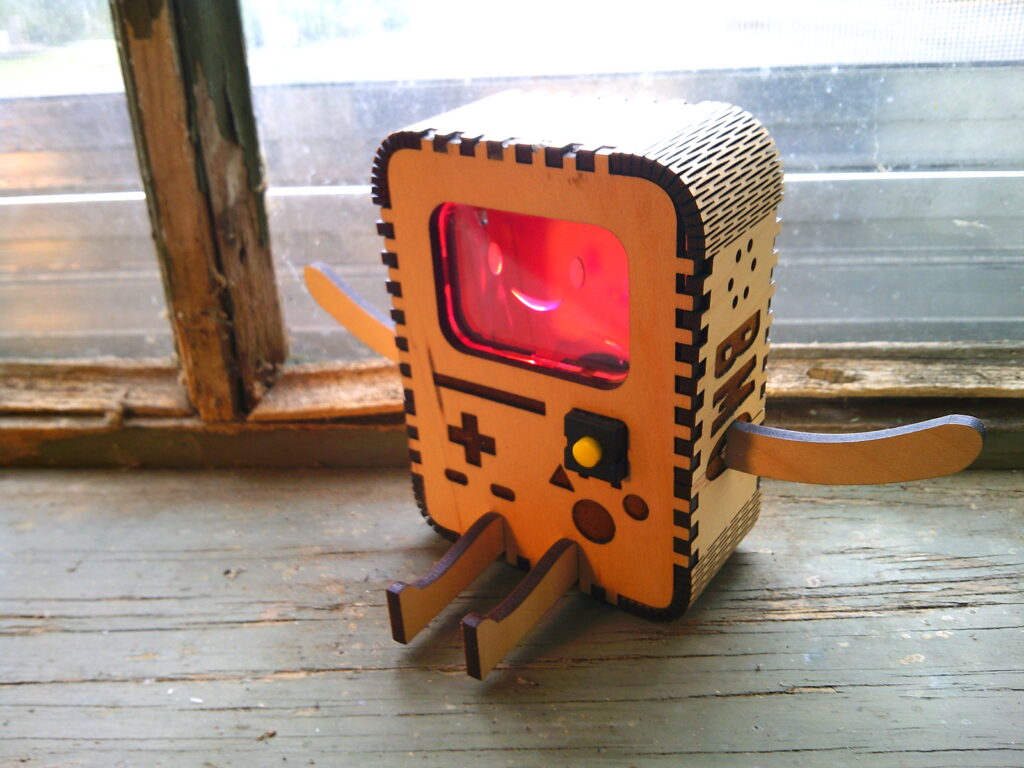
NOTE: The yellow on/off switch you see on my BMO Lamp above was not a very good on/off switch. I had so many of them fail, I stopped using them in my designs.
BMO has a little on/off switch on front which turns on a color changing LED so that BMO’s beautiful face fills any dark room with soothing, calm, slow changing light. The 2032 button cell battery is easy to change, and is found on the back. BMO sits about 4″ tall, arms reach nearly 6″ across, legs and body are about 3″ long. SVG Design by J.E.Moores from the JEMTOY studio, BMO would make a fun addition to any Adventure Time fan art collection.
Purchase the BMO Lamp SVG at Etsy
When you purchase the SVG from Etsy, you get 2 files. One for wood, one for acrylic plastic.
GLOWFORGE SETTINGS:
Cut the file: bmo-lamp.SVG from 1/8″ thick plywood.
- ENGRAVE (blue shapes, and BMO logo): HD Graphics
- RED: First cut
- BLACK: Last cut
Cut the file: bmo-lamp-face.SVG from 1/8″ thick clear acrylic.
- ENGRAVE (face): HD Graphics
- BLACK: Cut
Leave a Reply